One of the first things you should do when beginning to use a new device is to configure mobile connectivity. Most users want to make sure their phone has rapid access to calls, texts, and mobile data via their carrier’s network.
This article will walk you through the whole process of how to set up cellular on new iPhone, from choosing a carrier plan to activating it. You can also find out how to troubleshoot common issues so you can connect quickly.
1. Why You Need to Set Up Cellular on iPhone
Setting up cellular service on your new iPhone is essential to unlocking its full potential, ensuring you stay connected no matter where you are.
Here are the 3 main reasons you need to activate cellular on your device:
- Mobile Data Access
Cellular setup connects your iPhone to your carrier’s network so you can browse the web and use online apps when Wi-Fi is unavailable.
Without cellular data, your phone must use Wi-Fi or another supported connection for normal internet access. However, offline apps, downloaded content, GPS, and downloaded maps may still work without either connection.
- Calls & Texts
Activating cellular service links your device to a phone number, allowing you to make standard voice calls and send SMS text messages.
This keeps you reachable for everyday conversations and urgent communications without needing an internet connection.
- iMessage and Location
An active mobile line can verify your phone number with Apple, allowing you to use that number for iMessage. Phone-number activation may require SMS service and can take some time to complete.
Once activated, iMessage works over either cellular data or Wi-Fi. You may also use iMessage with an email address connected to your Apple Account.
Cellular service can help improve location accuracy, but GPS and Location Services do not depend entirely on an active mobile plan. For navigation without Wi-Fi or cellular data, download the required map area in advance.
2. Things to Do Before Setting Up Cellular on iPhone
Before exploring how to set up cellular on new iPhone, make sure you have the following essentials:
Active or Transfer-Ready Mobile Plan
First and foremost, you need a compatible carrier plan or the information required to activate one.
If you are transferring service from an old phone, make sure the account is active and eligible for transfer. Some carriers allow you to transfer the line during iPhone setup, while others require account verification or assistance from customer service.
In addition, before using the service, new users may be required to sign up for a plan.
Internet Connection
Your new iPhone needs a Wi-Fi or cellular connection to complete device activation. A reliable Wi-Fi connection is especially helpful when activating an eSIM, transferring data, or restoring a backup.
SIM or eSIM Activation Information
Depending on your setup method, you will require either a physical SIM card or an eSIM QR code issued by your carrier.
Other supported eSIM methods may include transferring the line from a nearby iPhone, using a carrier app, opening an activation link, or entering the eSIM details manually.
Not every iPhone includes a physical SIM tray, so confirm which SIM type your exact model supports.
Apple ID and Password
When it comes to how to set up cellular on new iPhone, have your Apple Account information available if you plan to restore an iCloud backup, use Quick Start, or transfer an eSIM from another iPhone.
An Apple Account may not be required for every carrier activation method, but it is needed for many Apple services and transfer features.
3. How to Set Up Cellular on New iPhone?
Wondering how up cellular on your new iPhone? The process is simpler than you would expect. Whether you’re using a traditional SIM card or activating an eSIM, Apple has made the process simple and straightforward.
Follow the 5-step guide below to connect your new iPhone in minutes.
- Step 1: Power On Your iPhone
Press and hold the Side button until the Apple logo appears. Once the welcome screen is displayed, follow the prompts to choose your language, region, and begin the initial setup.
- Step 2: Connect to a Wi-Fi Network
Connect to a reliable Wi-Fi network to activate and set up the device. A stable connection is especially helpful when activating an eSIM, downloading carrier settings, transferring data, or restoring a backup.
- Step 3: Add Your SIM or eSIM
When the Set Up Cellular screen appears, choose the option provided by your carrier.
If your iPhone supports a physical SIM, insert the correct nano-SIM into the SIM tray.
For an eSIM, you may be able to:
- Transfer the line from a nearby iPhone
- Scan a carrier QR code
- Use carrier eSIM activation
- Open a carrier link or app
- Enter the eSIM information manually
If you have already completed the initial setup, go to Settings > Cellular > Set Up Cellular or Add eSIM.
- Step 4: Complete Carrier Activation
Continue with the on-screen instructions to activate your cellular plan.
Depending on your carrier, activation may happen automatically or require account verification, a transfer PIN, a confirmation code, or assistance from the carrier.
Keep your old phone and SIM active until the transfer is complete unless your carrier instructs you otherwise.
- Step 5: Verify Your Cellular Service
After activation, check whether signal bars appear. You can also go to Settings > Cellular and confirm that the correct line is listed and turned on.
To verify the connection fully:
- Make a normal test call
- Send a text message
- Turn off Wi-Fi temporarily and open a webpage using cellular data
Signal bars alone do not guarantee that calls, texts, and mobile data are all properly activated.
>>>Read more: 4 Types Of iPhone SIM Card You Must Know [Latest Guide]
4. Common Cellular Set Up Issues & Troubleshooting Tips
Even if you follow the steps on how to set up cellular on new iPhone correctly, you may still run into activation or connectivity problems.
Here are some of the most common issues and how to resolve them.
- SIM Not Connecting or Not Detected: If your iPhone doesn’t recognize the SIM card, ensure it is inserted correctly and the SIM tray is fully seated. You can also try removing and reinserting the SIM or testing it in another compatible device to determine whether the issue is with the SIM or the phone.
- eSIM Not Appearing: Make sure the carrier supports eSIM on your exact iPhone model and plan. If you are transferring from another iPhone, keep both devices nearby, unlocked, signed in to the required Apple Account, and connected with Bluetooth turned on.
- No Service or Mobile Data After Setup: If your iPhone shows No Service or you can’t access mobile data, confirm that your cellular plan has been activated and that Cellular Data is turned on in Settings.
- Restart Your iPhone or Toggle Airplane Mode: A simple restart or turning Airplane Mode on for a few seconds, then off, can refresh your network connection.
- Check for a Carrier Lock: Go to Settings > General > About and find Carrier Lock. If No SIM restrictions does not appear, contact the carrier that locked the iPhone.
- Contact Your Mobile Carrier: If you’re still unable to connect after trying the above steps, contact your carrier for assistance. They can verify your account status, confirm that your SIM or eSIM has been activated correctly, and help troubleshoot any network or provisioning issues.
5. Why Won’t My SIM Connect to My New iPhone? What to Do
If your SIM card still won’t connect after completing the setup process, the issue may be related to your carrier, your SIM card, or your device.
In that case, contact your carrier and check your device as a last resort.
Contact Mobile Carrier
As mentioned earlier, your carrier can verify whether your SIM or eSIM has been activated correctly.
They can check for account or network issues and provide a replacement SIM or new eSIM profile if necessary.
Moreover, they can confirm whether your iPhone is compatible with your current plan.
Check Your Device
It is crucial to make sure your iPhone supports your SIM type and isn’t carrier-locked.
Using an older device with hardware issues or limited network compatibility may affect your process of setting up cellular on iPhone.
If that is your case, consider the Lifeline program, which helps make communications services more affordable for low-income individuals.
This is a federal assistance program that helps eligible households to acquire stable connectivity. Eligibility is based on income or participation in qualifying programs.
Just note that only one Lifeline benefit is permitted per household, and it is non-transferable. The discount can be applied to landline or wireless services.
The best thing about Lifeline is that it works with Eligible Telecommunications Carriers like Cintex Wireless.
They are approved service providers that deliver Lifeline-discounted services to customers. And in many cases, the providers also offer a free device for you to upgrade.
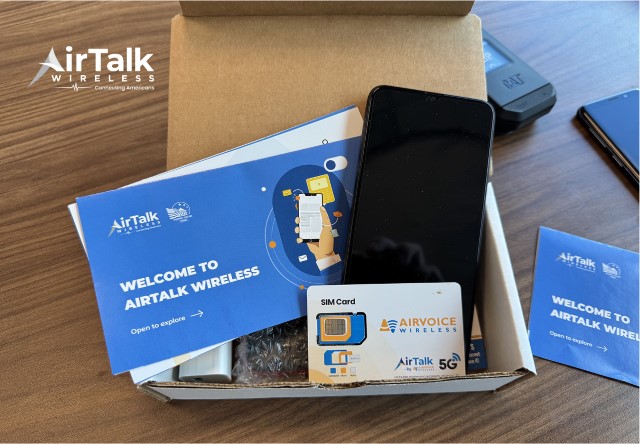
Moreover, as Cintex is merging with AirTalk Wireless, another reputable ETC, applicants can access more benefits, such as:
- A free or discounted iPhone or other models from popular brands
- Free talk and text
- Generous monthly data allowance
- Free international calling to various regions
- Dedicated customer support
- No credit check, no activation fee, no long-term contract, etc
DISCLAIMER: Eligibility varies by state and program. Offers depend on availability and qualifications. Cintex and AirTalk Wireless operate under the federal Lifeline Program as an Eligible Telecommunications Carrier (ETC). Service is non-transferable and limited to one service per household.
Conclusion
Finally, knowing how to set up cellular on new iPhone ensures you can start making calls, sending texts, and using mobile data without unnecessary delays.
Whether you’re activating a physical SIM or an eSIM, following the correct setup steps and confirming your carrier settings will help you get connected quickly.